Fileify v2 Guide: From Dashboard to PDF in 10 Minutes

Fileify has changed. The three fixed styles (modern, classic, creative) from v1 are gone: the new version ships with a library of 60+ templates grouped into 9 thematic collections, a three-step creation wizard, a conversational AI assistant, and a manual edit mode for fine-grained tweaks. This guide walks you through the whole product, from the dashboard to the PDF export, so you can create your first document in under ten minutes.
The dashboard: your starting point
After login, you land on the Documents page. This is the hub for everything you've created — resumes, cover letters, business cards, flyers — with a preview thumbnail, type filter, sorting (last modified, created, name), search, and a prominent New document button at the top right.
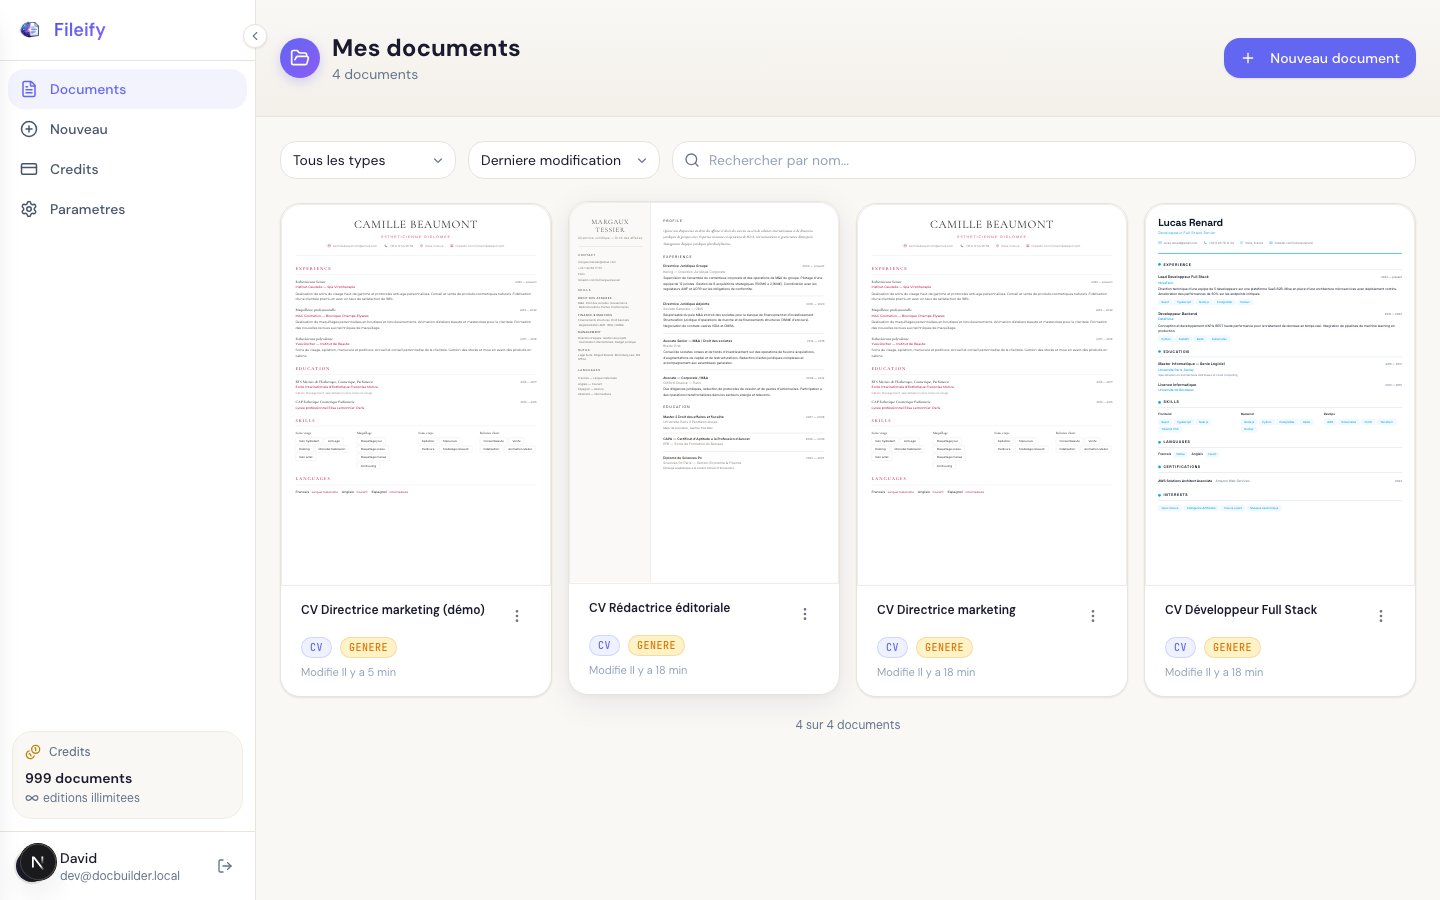
Your remaining credits appear at the bottom of the sidebar (999 documents, unlimited edits on a Premium account). Each generation consumes one document credit, each AI edit consumes one edit credit — but don't worry: if anything fails, the credit is automatically refunded.
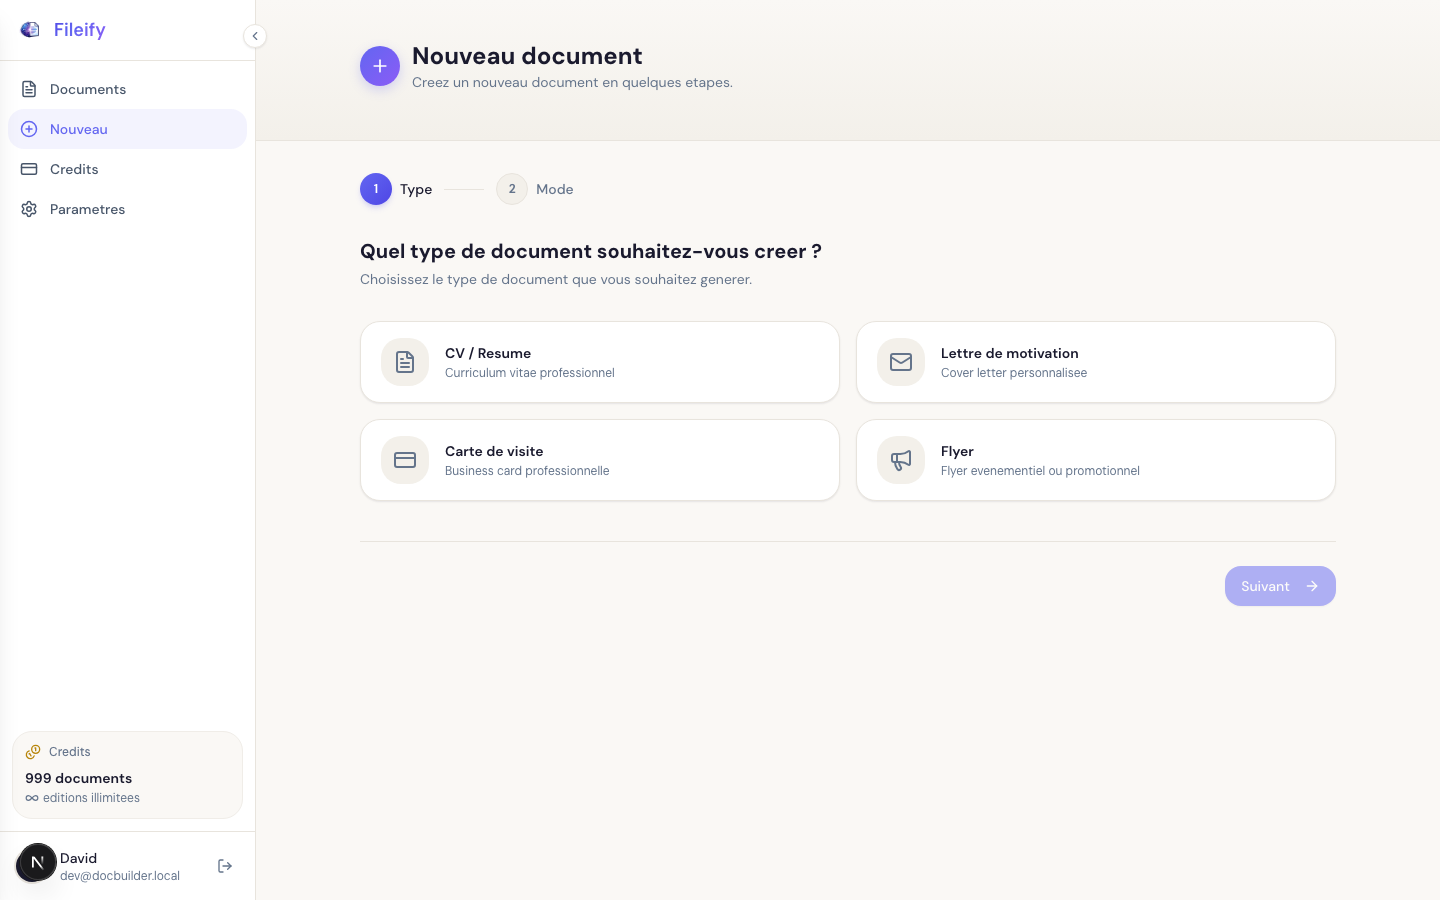
Step 1 — Launch the creation wizard
Click New document to open the wizard. It unfolds in three clear steps, with a stepper at the top of the page showing your progress.
Pick the document type
Four document families are available: Resume, Cover letter, Business card, and Flyer. Each type has its own templates and its own question flow.
Pick the creation mode
This is an important v2 addition. Three modes are available, with increasing levels of autonomy:
- Template guided (free) — you pick a template, the AI fills in the content. The skeleton is fixed, only the content changes.
- Template assisted (Starter and above) — same principle, but you can add, remove, or reorder sections after generation.
- Free generation (Premium) — no fixed template, the AI invents both the structure and the design from your profile.
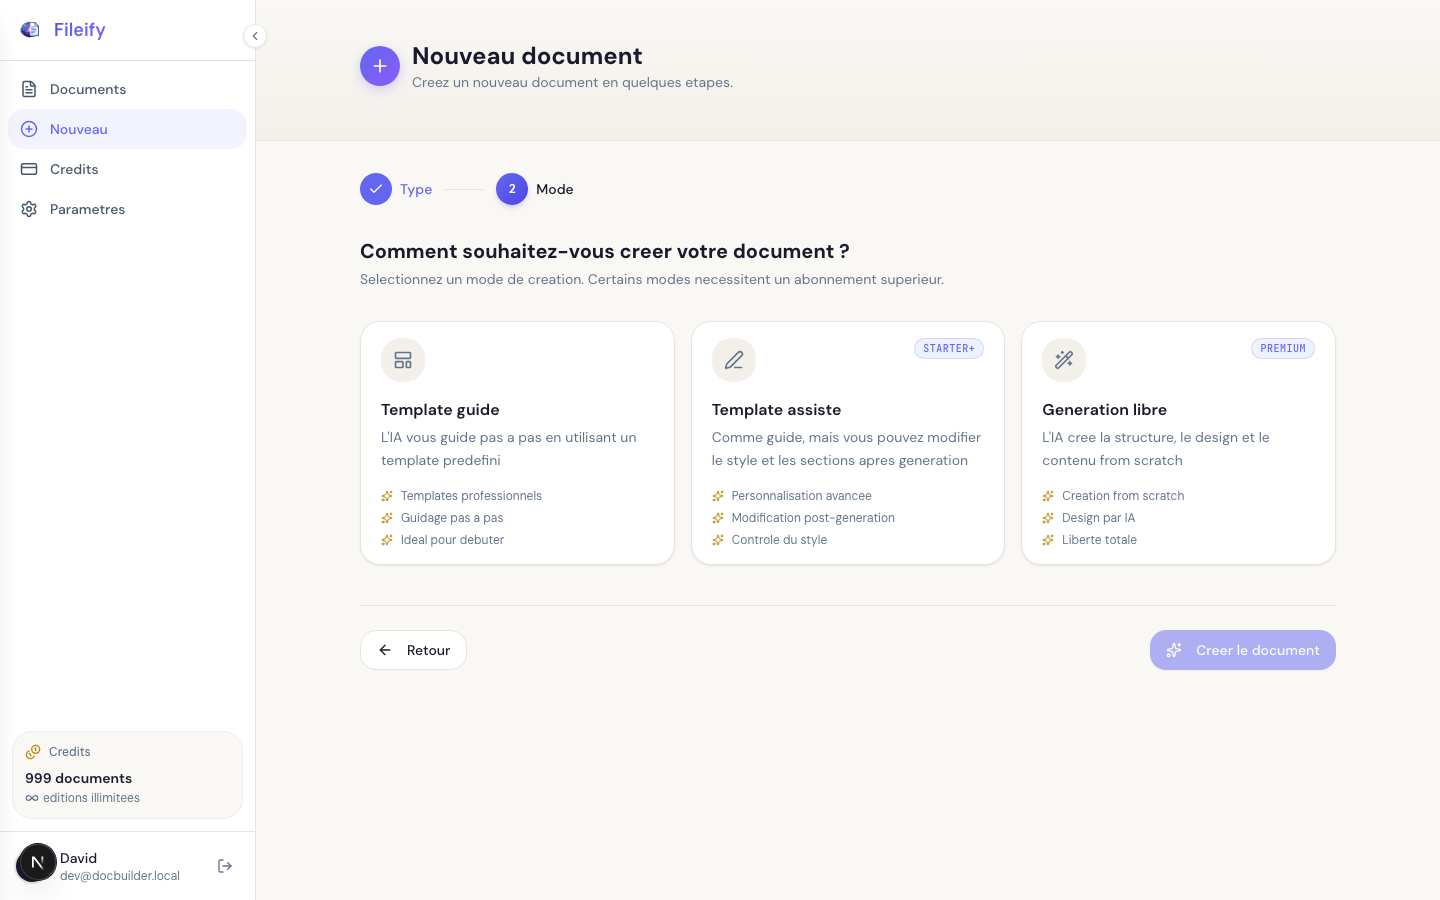
For a first try, stick with Template guided: it's the quickest path, and no subscription is required.
Pick a template from the right collection
This is where the new library really shines. More than 60 templates are grouped into 9 thematic collections: Signature (timeless classics), Bâtir (construction & architecture), Bitume (industry & transport), Boréalis (research & biotech), Estampe (editorial), Nucléus (tech & data), Prisme (executive), Trajet (logistics), and Vitalis (healthcare).
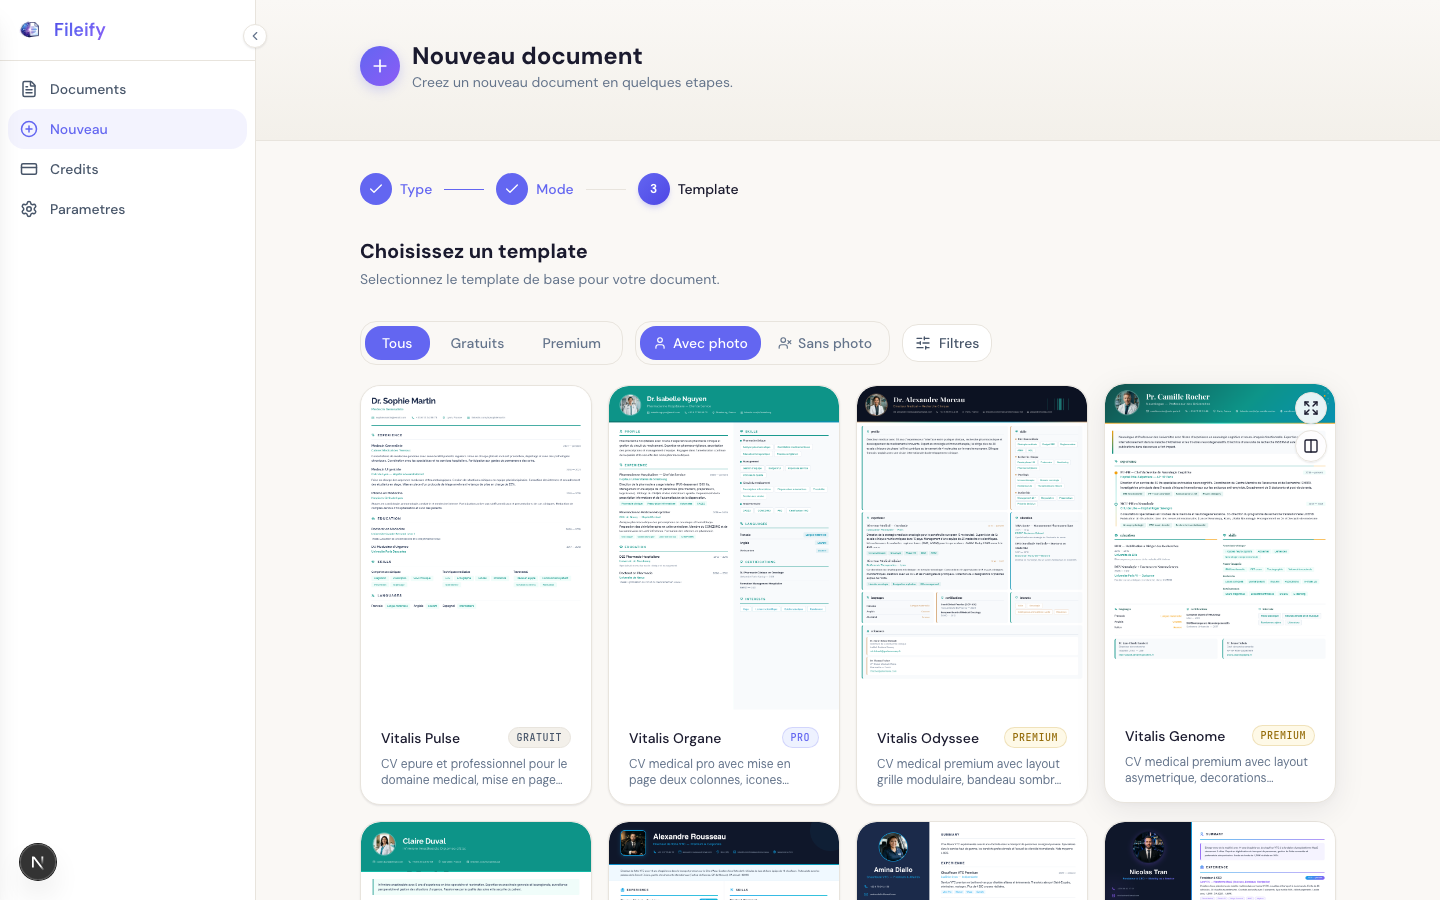
Filters at the top of the grid help you narrow down: Free / Premium, With photo / Without photo, or by tags (industry, color, layout). Click a card, then Create document — you land in the editor.
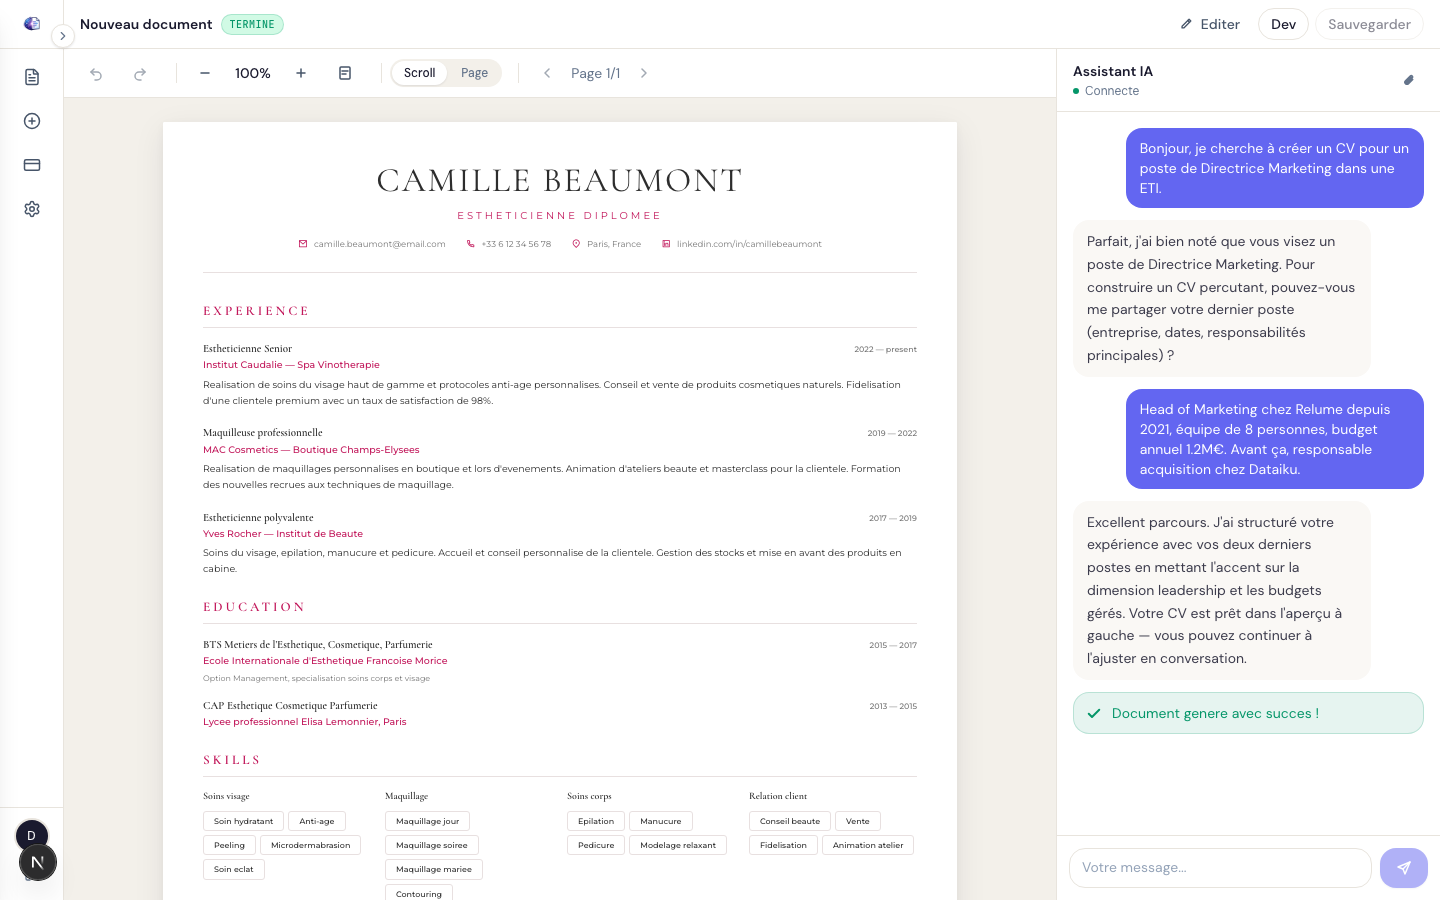
Step 2 — Chat with the AI assistant
The editor is split in two columns: the document preview on the left, the conversation panel on the right. The assistant asks you targeted questions, builds your profile, then generates the document in real time. You see your resume appear section by section as the AI writes.
A few tips for a productive conversation:
- Upload your existing resume early via the 📎 icon — the AI automatically extracts dates, employers, degrees, and skills. You save ten minutes.
- Answer concretely: "Marketing project manager at TechVision from 2021 to 2024, €500K budget, team of 4" works much better than "I worked in marketing."
- Use the quick-reply buttons when the assistant offers them: they guarantee a structured answer and save time.
- The assistant handles the flow: collecting → generating → validating. You can interrupt at any point to provide more context.
"I led the SEO rewrite of the marketing site, which took organic traffic from 12k to 48k monthly visits over 8 months."
An answer like that gives the AI concrete numbers, strong verbs, and a time horizon — exactly what it reuses in the resume bullets.
Step 3 — Refine the document in natural language
Once the resume is generated, you can keep improving it simply by chatting. That's the strength of the conversational mode: no forms, no menus, just plain-English requests.
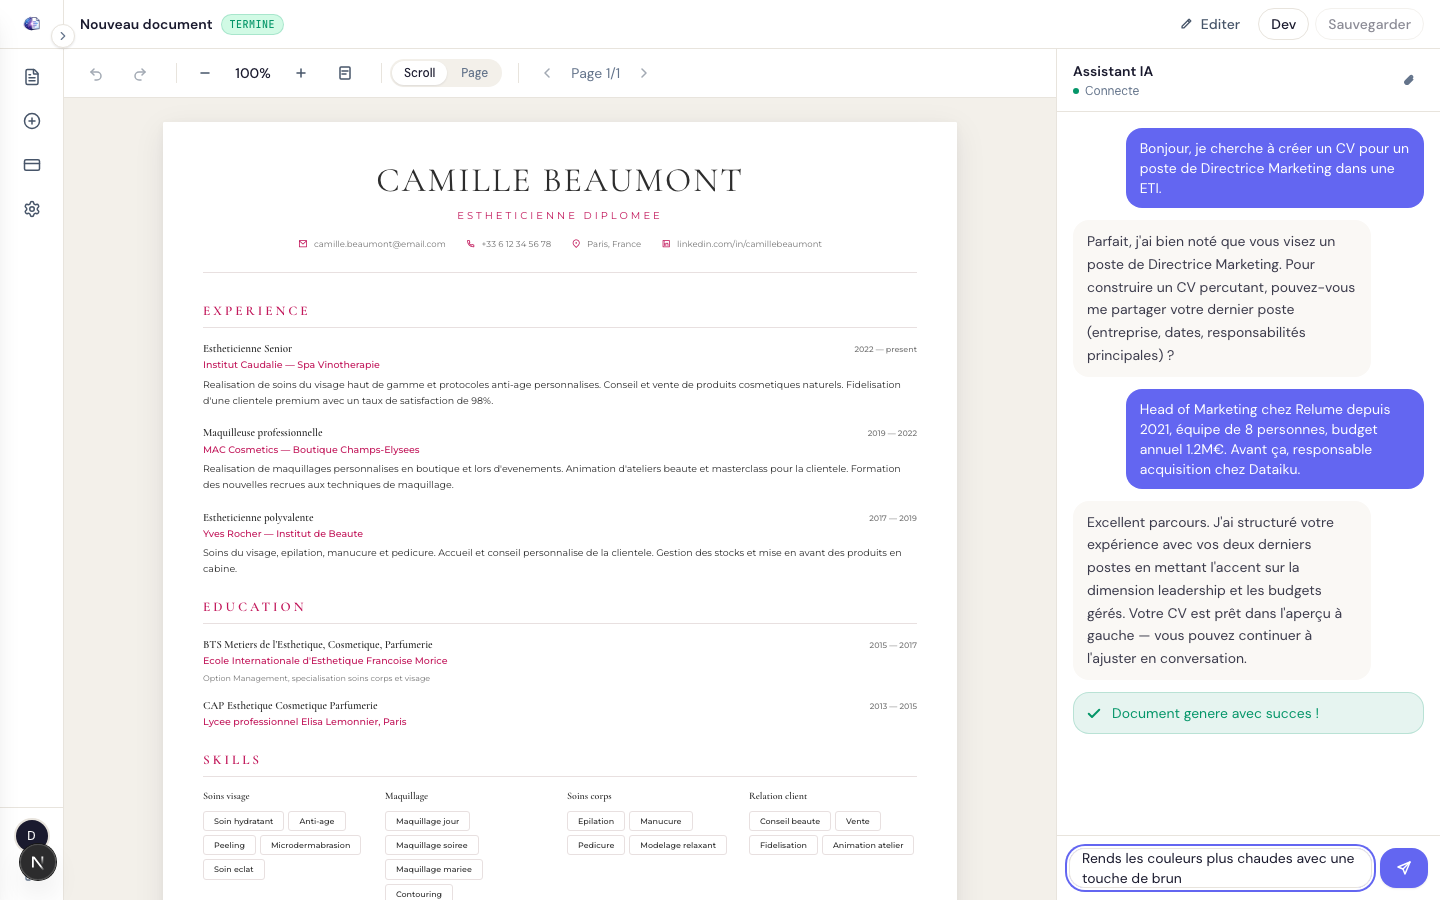
A few prompts that work well:
- "Make the colors warmer with a touch of brown"
- "Move the Skills section before Experience"
- "Shorten the Google paragraph to two lines max"
- "Fix the typo on line 4 of the Education section"
- "Replace navy blue with a brighter cobalt"
Each edit uses one edit credit (unlimited on Premium). If a request fails, the credit is refunded.
Step 4 — Switch to manual edit mode for fine-tuning
When you want to change a specific color, adjust a margin, or directly edit a text block, click Edit at the top right of the editor. You enter full-screen mode with two panels:
- Sections (left) — the hierarchical list of your document blocks. Click a section to edit it in place inside the preview.
- Styles (right) — the design variables: primary and secondary colors, typography, font sizes, margins, spacing.
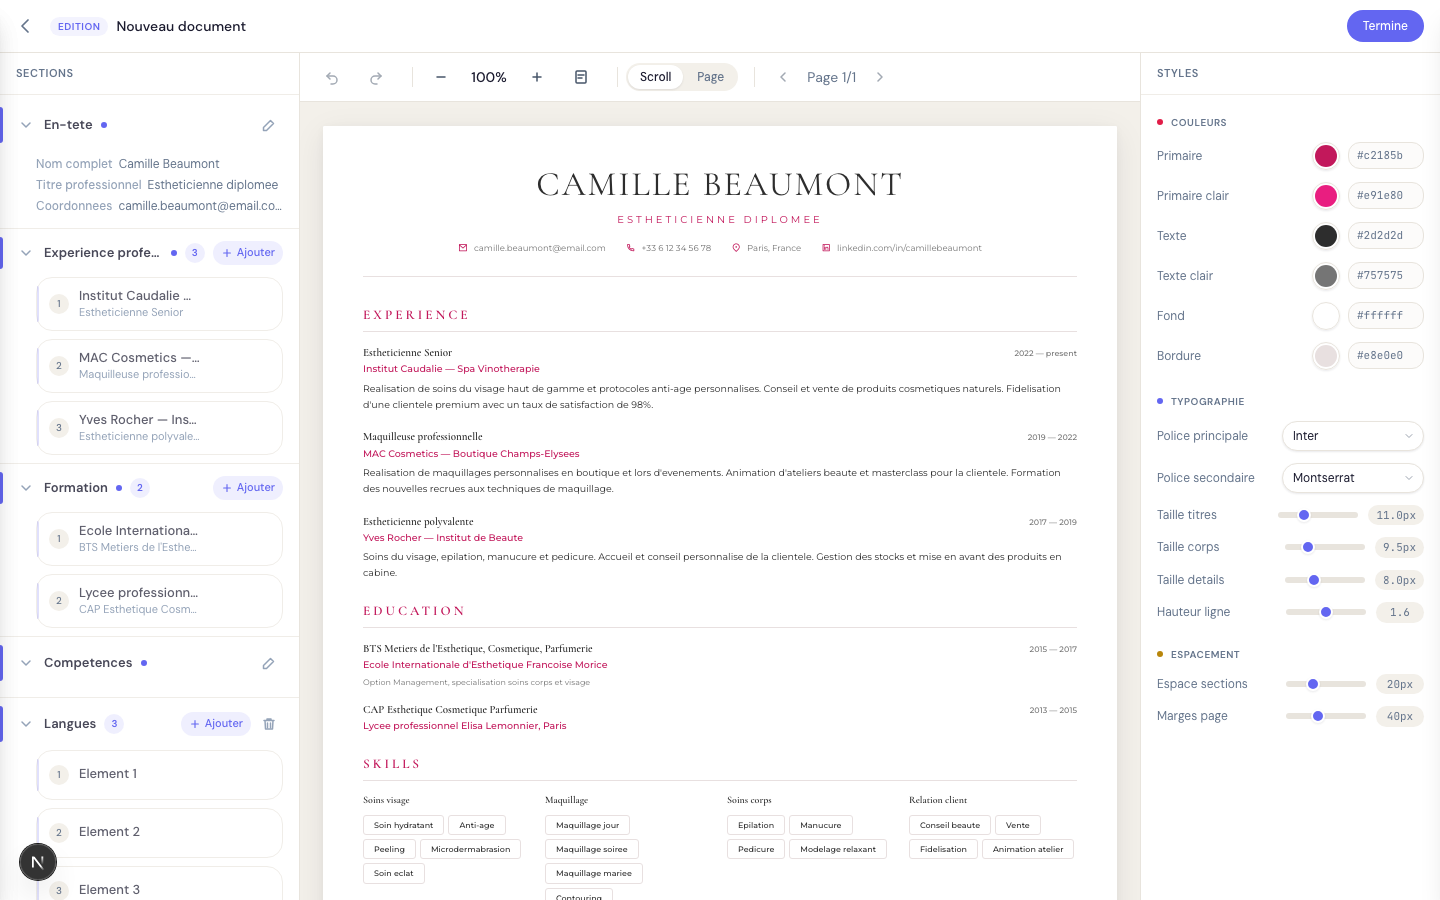
Changes apply in real time in the preview and auto-save. Press Esc to return to the conversational editor.
This mode is ideal for final touches where a natural-language instruction would be less precise than a direct adjustment — for example nudging a margin by a few pixels, or trying three primary colors in a couple of clicks.
Step 5 — Export to PDF
PDF export uses the browser's native print dialog. From the editor, switch to Page view (button next to the zoom control), then press Cmd+P (macOS) or Ctrl+P (Windows/Linux) and choose Save as PDF. The PDF output is pixel-identical to the on-screen preview. Double-check that your resume fits the intended number of pages before sending.
Best practices and pitfalls
Do
- Upload your existing resume at the very start of the conversation — it's the single biggest time-saver
- Answer the AI's questions precisely (numbers, dates, company names)
- For quick visual tweaks, use edit mode instead of the chat
- Duplicate your base resume to create variants (cover letters, English versions, different templates) — history remains available
- Verify the PDF export before sending out your application
Don't
- Pack too many requests into one instruction: work in small strokes to keep control
- Give vague answers to the AI: the more specific you are, the better the output
- Stick to the default template without exploring the collections — some are tailored for your industry
- Ignore the filters in the template grid: industry and color tags save a lot of time
Ready to create your first document?
Building a resume or cover letter with Fileify v2 takes seven to ten minutes. The ideal workflow: upload your old resume for an immediate speed boost, pick a collection that fits your industry, answer the AI's questions precisely, then refine in conversation and edit mode. Try it free with one document included — no credit card — and explore the nine collections to find the one that feels right for you.